PVC Fencing for Tampa Homes: Durability, Maintenance, and Style Options
Tampa sun, humidity, salt air and seasonal high winds put extra demands on residential fences, and PVC fencing is a common low-maintenance option homeowners consider. This short guide shows how PVC holds up in Tampa conditions, what a realistic maintenance routine looks like, and which style, reinforcement and cost choices matter most. You’ll leave with practical cleaning and inspection checklists, wind- and coastal-strength specifications, and a clear way to decide whether PVC is the right fence for your property.
Why PVC fencing is a smart choice for Tampa properties
Hard fact: for most Tampa properties, a well-specified PVC fence outperforms wood and many metal options because it resists biological decay and surface corrosion without routine painting or sealing. That matters where materials are constantly exposed to moisture and salt-laden breezes.
Trade-off to plan for: PVC is not maintenance-free in the literal sense – thermal expansion, UV-driven surface chalking, and hardware corrosion are the practical failure modes you must design around. Expect to pay more up front for thicker rails, metal reinforcement and corrosion-resistant fasteners if you want the fence to hold geometry and appearance through Tampa heat and storms.
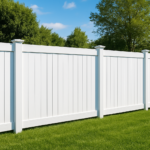
Concrete example – coastal property: A homeowner on a bayfront lot swapped a rotted wood privacy fence for 6 foot PVC privacy panels with aluminum inserts and stainless hinges. The upfront cost was higher, but panels kept straight through a hurricane-season storm and required only a pressure rinse afterward – no rot, no repaint.
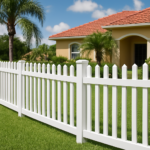
Concrete example – inland yard: For an inner-city bungalow wanting curb appeal, a white PVC picket fence gives the look of classic wood without repaint cycles. A local homeowner installed a preassembled 3 foot picket run as a DIY weekend job; it stayed bright with quarterly rinses and simple gate adjustments.
What to specify and why
- UV-stabilized formulation: prevents premature chalking and color fade – nonnegotiable in high-UV areas.
- Reinforced rails or metal inserts: controls flex and wind load transfer; without them taller panels will bow.
- Stainless or hot-dipped galvanized hardware: avoids the common pitfall of rusted hinges and fasteners near salt air.
- Concrete footings to proper depth: keep posts from loosening with soil movement during heavy rain events.
Common misjudgment: people assume all vinyl is identical. Lower-cost PVC fence panels often skip UV inhibitors and use thinner profiles that warp sooner. Warranties look good on paper but are voided by improper installation; that is where local code knowledge and correct embedment depth actually preserve warranty value.
If your property is within a few miles of open water, budget for reinforced posts and corrosion-resistant hardware even if the initial quote looks higher.
Durability considerations: structural performance and lifespan in Tampa
Bottom line: in Tampa the single biggest determinant of a PVC fence surviving 10+ years is not color or texture but how the system is engineered for heat, salt and wind. Material choice matters, but connection details and anchoring matter more.
PVC itself resists rot and insects, but the realistic failure modes you will see here are different: panels that warp from repeated thermal cycling, joints that loosen from expansion and contraction, metal fasteners that corrode and stain profiles, and posts that pull or tip under sustained wind. Designing for those forces changes the specification from cheap white panels to a reinforced system that keeps shape and function.
Practical trade-offs that matter
Cost versus long-term performance: thicker rails, aluminum or galvanized inserts, and heavier posts add 10 to 30 percent to initial PVC fence cost but cut the risk of bowing and post failure. If you skip reinforcement to save now, expect alignment and gate-sag repairs within a few years in wind-prone areas.
Appearance versus heat management: darker textured finishes look upscale but absorb more heat; in direct sun that raises surface temperature and accelerates softening on lower-quality formulations. For full-sun exposures prefer lighter colors or high-grade formulations with documented UV and heat stabilizers.
Maintenance realism: PVC is low-maintenance, not no-maintenance. Small routine checks on fasteners and post plumbness prevent minor issues from becoming structural repairs that require panel removal and re-setting.
Concrete example: A duplex near the bay replaced a failing wood fence with 6 foot PVC privacy panels fitted with galvanized steel inserts and 36 inch poured footings to meet local wind requirements. After a seasonal squall with gusts over 60 mph the fence had cosmetic scuffs and a single hinge to tighten; no posts were replaced, and no panels bowed — the initial extra spend avoided a major repair.
| Situation | Minimum specification to request (discuss with installer) |
|---|---|
| Inland, low-exposure yards | Heavier-profile PVC panels, 4x4 equivalent posts, concrete embedment 24–30 inches |
| Coastal or high-wind exposure | Aluminum/galvanized inserts, 6x6 equivalent posts or larger, concrete embedment 30–36+ inches, stainless fasteners |
| Pool or safety fences | Impact-rated panels, corrosion-resistant hardware, self-closing/locking gates per local codes |
Judgment call: many suppliers market panels by appearance only. Insist that quotes list reinforcement, fastener type, embedment depth and code references. A warranty is only as good as the installation called out in its terms — if the paperwork does not reference local wind or embedment requirements, assume the warranty will be limited.
If you want guidance on local wind zones and code-compliant details, review Florida Building Code and developer tech literature from the Vinyl Fence Institute. For coastal properties the practical decision is rarely whether to use PVC but which reinforced assembly to install.
Maintenance plan: cleaning, inspections, repairs, and stain prevention
Start with a predictable routine. A simple, repeatable calendar prevents small issues from turning into panel swaps or post resets. Think of maintenance as three actions you perform on a schedule: light cleaning, a seasonal deep clean and hardware/post checks, and event-driven inspections after storms or pool/landscape work.
Practical schedule and how to do it
- Monthly quick-check: Walk the line for leaning posts, sagging gates, missing fasteners, and obvious stains. Take phone photos to document changes over time for warranty records.
- Every spring and fall deep clean: Wash panels with warm water, a tablespoon of dish soap per gallon, and a soft-bristle brush. For mildew or organic staining use a diluted bleach solution (about 1 part bleach to 10 parts water) — test a hidden spot first and protect plants. Avoid scouring pads and solvent cleaners that dull the finish.
- Hardware service every 6–12 months: Tighten hinges and latch screws; replace any corroded screws with stainless or hot-dipped galvanized fasteners. Lubricate hinges with a silicone spray, not heavy grease.
- Post and footing inspection every 2–3 years: Check for movement, soil washout, or cracking around concrete. If a post moves more than a half-inch under hand pressure, plan for professional re-setting.
- After big weather events: Immediately inspect for loose panels, bent rails, or impacted posts. Small repairs done promptly keep the cost and scope down.
Pressure washer caution and technique. If you use a pressure washer, keep it low-pressure only: around under 1200 psi, wide fan tip, and a 12–18 inch distance. Higher pressure or narrow tips will etch or soften vinyl and can force dirt into seams.
Stain prevention and removal — what actually works. Rust streaks come from corroded fasteners or nearby metal; the long-term fix is replacing the source with stainless hardware. For existing rust or tannin stains, use a non-abrasive cleaner formulated for vinyl or a diluted oxalic-acid product following label instructions. Organic mildew responds to the diluted bleach method above; oil or paint requires a solvent only as a last resort and should be spot-tested.
Trade-off to accept: DIY cleaning and small part swaps save money but miss hidden problems in posts and footings. Post re-sets and reinforcement are not DIY-friendly where wind loads or coastal corrosion are factors — those should go to a licensed installer.
Concrete example: A Tampa homeowner with a pool noticed brown streaks below the coping after the first summer. They replaced three corroded hinge screws with stainless fasteners, cleaned the streaks with an oxalic-acid cleaner, and within a week the fence looked uniform again. Because they logged photos and receipts, the manufacturer honored a minor finish warranty for one affected panel.
Key action: document every inspection with dated photos and receipts. Warranties and future repairs hinge on proof you maintained the fence.
Style and design options for Tampa homes
Direct point: PVC fencing gives you more than just low maintenance — it lets you pick a visual language that matches neighborhood character and performance needs. Choose style based on exposure and use, not only on curb appeal.
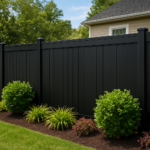
Practical trade-off: decorative or wood-grain textured PVC looks upscale but usually costs more and can hide stress lines that appear under thermal cycling; smooth lighter colors resist visible warping and are easier to match years later. If your lot gets all-day sun or is wind-exposed, prioritize structural profile over ornamentation.
Popular PVC styles and the right use cases
- Full privacy panels: best for backyards, noise reduction, and pool screening when paired with reinforced rails and secure gates; they deliver the cleanest visual privacy but require robust post reinforcement in high-wind zones.
- Picket and cottage styles: suit front-yard and garden edges; ideal for lower heights (2–4 ft) where DIY or preassembled runs are practical and HOA rules favor traditional looks.
- Semi-privacy and shadowbox: balance airflow and seclusion; shadowbox panels provide visual privacy on one side and a decorative face on the other — useful when you want both curb appeal and wind permeability.
- Ranch rail and split-rail: appropriate for property definition without blocking views; use heavier rails or hidden metal inserts if horses, pets, or coastal winds are a factor.
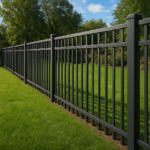
- Ornamental and modern slat fencing: delivers contemporary lines or metal-look detailing; choose these only if you specify UV-stable coatings and confirm wind-load ratings with the manufacturer.
Security and pool considerations: For pool enclosures, follow local code on height, self-closing hardware, and latch positioning; a 4-ft code-compliant vinyl pool fence with stainless latch hardware is a common specification we see enforced at inspection. For security, a continuous top cap and internal reinforcement are more important than decorative picket tips.
Design detail that matters in practice: match post caps, gate hardware finish, and color to the long-term plan. White panels weather differently than tan or wood-grain finishes — replacing a single panel years later is easier with a stock white PVC than with a discontinued textured finish.
Concrete example: A Tampa homeowner wanted a pool barrier that blended with tropical landscaping but also met code. They chose a 4-ft white PVC pool fence with self-closing hinges and stainless fasteners; the installer used hidden metal inserts to keep gate geometry tight. Result: passed the county inspection with no rework and minimal sightlines into the yard from the street.
If your design priority is longevity in coastal exposure, specify reinforcement and stainless hardware up front — styling can come second to structural choices without significant visual penalty.
Installation and local compliance: permits, HOA rules, and wind load requirements
Permits and HOA approvals are the two gatekeepers that determine cost, timeline, and the exact PVC fencing assembly you can install. Do not assume approval is automatic; municipalities and neighborhoods enforce different standards for height, visibility, and structural reinforcement.
Practical constraint: getting materials delivered before permits are issued is a common mistake. If a city or HOA requires a change to panel height, color, or a stamped wind-load drawing, returning or reworking ordered panels and hardware adds weeks and extra expense.
What local authorities typically want
What officials review: building departments look for footing depth, post size, wind-load compliance, gate hardware details, and a site plan showing property lines and setbacks. HOAs focus on visual conformity — color, picket spacing, and gate style — but may not review structural reinforcement unless it affects appearance.
- Before you book an install: get a current property survey or stamped plot showing the fence line and setback requirements.
- Permit submission items: elevation drawings, product spec sheet for
pvc fence panels, reinforcement details (aluminum/steel inserts), and gate hardware specs. - HOA submittal tips: include material samples, photos of the proposed finish, and a short installer scope that lists post embedment depth and fastener type.
- Utility locating: request a mark from 811 before digging; contractors who skip this put you at legal and safety risk.
Trade-off to budget for: engineered or stamped drawings for wind loads cost extra up-front but prevent rejected permits and meet inspection without rework. In practice, the engineering fee is cheaper than replacing a noncompliant section after installation.
Concrete Example: A homeowner in South Tampa planned a 6-ft PVC privacy fence. The county required a wind-load calculation because the lot sits in a higher wind zone, and the HOA demanded a color sample. The installer paused ordering custom rails until the stamped drawing arrived; the project passed inspection first time and avoided a return of bespoke panels.
Always ask your installer to be the permit holder and to provide the exact product spec tied to the permit package.
Judgment: contractors who quote without addressing permits and wind-load documentation are low-risk for you only if you are prepared to manage red tape. For Tampa properties, hire an installer who integrates permitting, HOA submittal, and inspection scheduling into the price — it reduces schedule risk and protects warranties.
Next consideration: before signing, get written HOA approval that names materials and colors and confirm your installer will obtain permits and inspections. If your property is in a coastal wind zone, insist on stamped wind-load details and metal reinforcement specified on the permit paperwork.
Cost, value, and warranty: budgeting and long term return on investment
Upfront price is only half the decision. For Tampa homeowners the smarter question is what you will pay over the life of the fence, including reinforcement, permit costs, repairs after storms, and the value of not repainting or replacing rotten wood. Budget with those line items up front and you avoid the common mistake of buying cheap panels and paying for repeat fixes.
What drives the bill and how to prioritize spend
- Materials versus profile: thicker-profile panels and UV-stable formulations raise material cost but reduce warping and visible aging. Think of this as an insurance premium against replacement.
- Structural reinforcement: metal inserts, heavier posts, and deeper footings add to install cost but protect geometry in storms — these are not optional on windy or coastal lots.
- Site complexity and prep: uneven grades, hidden utilities, rooflines and pool setbacks increase labor and may require engineered drawings for permits; factor these before you sign.
- Hardware and gates: stainless or hot-dipped galvanized hinges, self-closing gate hardware for pools, and keyed locks are modest line items that avoid corrosion failures later.
- Permits, HOA compliance, and engineering: budget a fixed allowance for permit fees, HOA samples, and, when required, a stamped wind-load calculation. Skipping this will cost more if panels must be reworked.
Practical trade-off: spending more on the assembly up front — not just prettier panels — is the single best way to reduce lifetime cost. Cheap vinyl with no reinforcement often requires panel realignment, gate rehanging, or partial replacement inside a few seasons; a correct assembly keeps those bills away.
Warranty reality check. Manufacturer warranties frequently cover material defects for multiple decades, but they commonly require documented maintenance and correct installation to remain valid. Installer workmanship warranties are shorter but crucial; make sure both warranties are written into the contract and that the installer signs on as the permit holder.
Concrete example: A homeowner in a mid-Tampa neighborhood compared two quotes for a backyard privacy run. The low bid excluded metal inserts and used standard fasteners; the higher bid included galvanized inserts, stainless hardware, and permit handling. After weighing the risks, the homeowner chose the higher bid — the fence held alignment through two seasonal storms and required only routine cleaning, avoiding a costly re-set that the low-bid job would likely have needed.
| Budget factor | Quick rule to estimate impact |
|---|---|
| Per linear foot material and labor | Use a mid-to-high range quote for your style and add 10–20% for coastal reinforcement |
| Gates and hardware | Add a per-gate premium for stainless hardware and self-closing mechanisms |
| Permits/engineering | Plan a flat fee for permit filing and an extra contingency if stamped drawings are required |
Save warranty value: keep dated photos and receipts of cleaning and minor repairs. Warranties are often honored when you can show routine maintenance and that the installer followed the specified assembly.
If you want a practical comparator, review sample product warranties at CertainTeed and market cost guidance on HomeAdvisor. When you request an estimate, ask the contractor to list these warranty links and to confirm they will be the permit holder — it saves time and protects your long-term return.
How to choose a contractor and next steps with Vilo Fence
Start with responsibility: hire a contractor who takes permit and warranty accountability. A good installer will be the permit holder, list the exact product model and reinforcement detail in writing, and provide an explicit workmanship warranty tied to the installation scope. If a bid omits who will handle permits or which brand/model will be used, treat that as an incomplete offer.
What a complete estimate should include
- Product identification: manufacturer, model number, color and UV-grade statement so future replacement matches.
- Structural details: post size, embedment depth, type of metal inserts or reinforcement, and footing specs for your wind zone.
- Hardware callout: fastener materials (stainless or hot-dipped galvanized), hinge type, and gate mechanism details.
- Permit and HOA handling: who applies, what drawings are included, and estimated timelines for approvals.
- Warranty and claims process: links to manufacturer warranty, installer workmanship period, and the contact procedure for claims.
- Payment and schedule: deposit amount, progress milestones, final retention until inspection/pass, and cleanup/disposal terms.
Practical trade-off: paying a bit more for an itemized estimate reduces your downstream risk.** Low-cost bids often hide omissions—no metal inserts, cheap fasteners, or no permit work—and those omissions surface after a storm or at inspection, costing more to fix than the original savings.
- Ask to see recent local work: request photos from installs in the last 12 months and call two references.
- Clarify who will be onsite: will the company use its own crew or subcontract, and who signs the permit?
- Request a mock-up or sample: a short panel or post sample on site shows color and fit before full order.
- Confirm post-install inspection: require the installer to remain until the county/HOA inspection passes.
Concrete example: A homeowner with a pool and an HOA required a stamped wind-load drawing before approval. Vilo Fence performed a site visit, supplied the stamped detail, listed aluminum inserts and stainless hardware on the permit package, and scheduled work only after HOA sign-off. The project passed the county inspection without rework and the owner avoided the common delay of reordering panels to meet new specs.
Judgment you can act on: treat the contractor as a systems integrator, not just a laborer.** The real risk is fragmented responsibility—panels ordered by one party, permitting handled by the homeowner, and a subcontractor doing the install. That setup usually creates warranty disputes and inspection failures. Prefer a local installer who demonstrates Tampa experience with wind and coastal corrosion issues.
Ready for a site visit? Prepare your property survey, note exposure (bay-facing, full sun, pool), and collect any HOA guidelines before requesting a quote. For a convenient request, use the Vilo Fence contact page.