Gate Installation Guide: Types, Automation Options, and Pricing for Residential Gates
If you are planning a gate install for a Tampa-area home, this guide cuts through materials, automation choices, and the site and permit issues that actually drive cost. You will get clear pros and cons for swing, sliding, and cantilever gates, the power and safety requirements for automatic installs, realistic local pricing ranges, and simple checklists to prepare your property. Read on for sample budgets, maintenance expectations, and the questions to ask any local gate installer before you sign a contract.
1. How to decide whether you need a gate and which function it should serve
Start with the problem you need the gate to solve, not the look you want. Homeowners pick gates for a handful of concrete reasons – vehicle access control, security, privacy, pool safety, pet containment, or curb appeal – and each goal points to different styles, materials, and installation requirements.
Function-first decision flow
- Identify the primary function: security, privacy, hands-free vehicle access, or child/pet safety.
- Measure practical limits: driveway width, slope, turning circle, and lateral clearance for a sliding track.
- Pedestrian needs: do you need a separate pedestrian gate or ADA-friendly swing? That affects post placement and hardware.
- Power and automation choices: do you have reliable 120V nearby or will you need solar/battery? Automation changes footing and electrical scope.
- Permits/HOA: confirm local permit requirements with Hillsborough County and get HOA approval before ordering custom work – see Hillsborough County permits.
Practical tradeoff: a swing gate is simpler and usually cheaper to fabricate and install, but it needs clear swing radius and struggles on steep driveways; a sliding or cantilever gate solves space and slope problems but requires a longer foundation and more upfront cost for track, rollers, or cantilever supports.
Common mistake: people choose automatic operators or ornate metalwork first, then discover the site won't support that choice without heavy foundation work. Pick the gate type that fits your site and function, then specify automation and finishes to match.
Concrete Example — South Tampa narrow alley: a 10-foot-wide driveway with a 6-inch rise from curb to house usually needs a single-leaf swing gate with a low-profile hinge and solar-assisted operator to avoid trenching electrical. The swing keeps costs down and works where lateral clearance for a sliding gate is absent.
Concrete Example — Westchase wide suburban drive: a 16-foot double-leaf entrance used primarily for vehicle access benefits from a pair of automated swing leaves with masonry posts and robust hinges; if the driveway has limited setback, a 16-foot single sliding gate on a concrete run may be the better long-term choice despite higher initial cost.
If your driveway slope exceeds about 6 degrees, treat swing gates with caution — sliding or cantilever is usually the safer, more durable option.
2. Gate types and materials: pros, cons, and Tampa suitability
Material selection and gate style set most of the long-term cost and headache for a gate install in Tampa. The right material reduces corrosion work, lowers service calls, and determines what type of operator you can use reliably. Treat this decision as structural first and aesthetic second.
How gate style interacts with material in real conditions
Swing, sliding, and cantilever behave differently under load. Lightweight aluminum works well for long single-leaf swing gates because it reduces hinge torque and operator stress. Heavy steel or wrought iron gives you a secure, rigid leaf but demands bigger posts, gussets, and stronger hinges or a sliding solution to avoid premature sagging.
| Material | Pros | Cons | Tampa suitability |
|---|---|---|---|
| Aluminum (ornamental) | Corrosion resistant, low maintenance, lighter weight | Less rigid for very long spans unless boxed frame used | Best default for coastal properties and low-care installs |
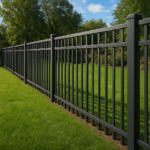
| Galvanized + powder-coated steel | High strength, security, accepts fine weldwork | Requires proper galvanizing and coatings; heavier footings | Good where strength matters if specified for coastal use |
| Wrought iron / decorative iron | High-end look and perceived value | High maintenance, can rust quickly without care | Choose only with tight maintenance plan and stainless fasteners |
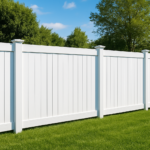
| Western red cedar / hardwood | Warm aesthetic, privacy options, easy to custom-fit | Swells, rots, termites in humid salt air without treatment | Use where appearance matters and owner accepts seasonal upkeep |
| Vinyl / PVC | Very low corrosion, low maintenance | Limited styles; needs reinforced posts for large vehicle gates | Practical for pedestrian or light driveway gates with reinforcement |
| Chain link with slats | Most affordable and durable; simple repairs | Poor curb appeal, limited privacy unless slatted | Good for back-of-property security gates or utility areas |
Practical tradeoff: if you need long-term low maintenance in salt air, choose aluminum and spend slightly more on a boxed frame or reinforced mounting. If you want maximum resistance to impact and theft, pick galvanized steel but budget for heavier concrete footings, stainless fasteners, and a professional weld finish.
Concrete example: a Hyde Park bungalow owner wanted a full-privacy board-on-board look. The team used pressure-treated cedar with penetrating sealer, stainless hinge hardware, and a steel-reinforced frame to prevent sagging. It looks like a wood gate but requires an annual seal and inspection for rot around the bottom board in Tampa humidity.
What installers get wrong in practice: many local contractors quote the cheapest metal and a standard paint job without specifying galvanizing or powder coat thickness. That saves upfront cost but guarantees touch-ups and rust spots within a few years on bay-front properties. Pay the small premium for the correct finish now and you avoid repeated repainting and part replacements.
Next consideration: match the chosen material to the gate type and expected load before you pick an operator. The wrong material-operator pairing is the most common cause of call-backs and early failures on local installs.
3. Gate configurations, hardware, and structural requirements
Start with structure, not style. For any successful gate install the single biggest failure point is inadequate foundations or undersized posts, not the operator or finish. If a gate sags, binds, or misaligns after six months the root cause is almost always the mount and anchoring.
Hardware that matters in real installations
Core components and material choices. Use stainless or hot-dipped galvanized fasteners, stainless bearings in rollers, and hardware rated for marine environments on coastal jobs. Cheap zinc plated hinges and bolts look fine at first but fail quickly in Tampa humidity.
- Hinges and pivot assemblies: heavy duty welded hinges for metal gates; offset or low-profile hinges for sloped driveways
- Bottom support: gate wheels or adjustable rollers for leaves over 7 feet or heavy wood panels to prevent hinge overload
- Sliding hardware: heavy guide rollers for cantilever units, bottom rollers for tracked gates, and anti-lift brackets
- Latches and locks: electric strikes for automatic gate install, and mechanical drop bolts for manual securement
- Operator anchors: reinforced concrete pad and anchor bolts sized to manufacturer data plate
Tradeoff to accept up front. Lighter gates reduce hinge and operator load and often let you choose a smaller footing; heavier steel or ornate iron demands larger piers, reinforced headers, and sometimes welded trusswork. Paying for beefier foundations is painful up front but far cheaper than rebuilding a sagging gate later.
Foundations, posts, and when soil matters
Rule of thumb ranges and when they change. For typical sandy Florida soils a common spec is an 18 to 24 inch diameter pier 30 to 36 inches deep for swing gate posts; heavy industrial or waterfront installs often move to 24 inch plus diameter piers and deeper embedment or concrete footings continuous under a sliding run. If you see loose sand, high water table, or fill soil, upsizing or using helical piles is not optional.
When to use masonry or steel posts. Choose masonry or concrete-filled steel posts when the gate leaf exerts large moment loads, such as long single-leaf sliding gates or heavy timber privacy gates. Steel posts permit smaller footprints for narrow properties but must be hot-dip galvanized and field sealed at cut edges.
Practical alignment reality. Cantilever sliding gate installation requires precise weld tolerances and a level, straight concrete beam for rollers. Many local gate installers skip the full-length reinforced footing and later return to adjust rollers. Insist on a poured, reinforced slab under rollers and keep documentation in the contract.
Concrete example: A homeowner in a waterfront neighborhood wanted a 14 foot galvanized sliding gate. The installer poured a continuous 12 inch wide reinforced footing 18 inches deep with stainless anchor bolts and a 30 inch by 24 inch concrete pier for the operator. The reinforced run prevented track flex during king tide events and kept the motor alignment within manufacturer tolerances, avoiding premature gear wear.
Common installer mistakes. Local gate installers sometimes mount electric gate operators on temporary concrete pads or compacted fill to save time. That technique fails under cycling load. Demand manufacturer anchor detail and UL 325 compliance for electric gate install anchoring and safety devices. See UL 325 standard at UL 325 and check local permit expectations at Hillsborough County permits.
Final judgment to guide decisions. For a reliable driveway gate install choose hardware and foundations sized to the worst reasonable condition on your lot, not the average. Skimping on anchors or using incorrect hardware is cheap today and expensive every rainy season thereafter. Next consideration: verify that your quote lists exact footing sizes and hardware brands so you can compare installers on apples to apples basis.
4. Gate automation options, controls, and safety requirements
Automation is a structural decision, not a cosmetic one. Specifying an operator changes footing, electrical scope, code obligations, and liability for a gate install. Decide on power source and basic control method before finalizing gate material or decorative details so your contractor can size pads, conduits, and safety devices correctly.
Power choices and practical tradeoffs
Hardwired 120V delivers the most reliable, storm-resistant operation but usually requires trenching and an electrical permit. 24V battery operators are safer (lower entrapment force), easier to install in retrofit situations, and tolerate intermittent solar charging. Solar with battery eliminates long cable runs and can be cost-effective in Tampa, but only when panels are unobstructed and batteries are sized for several overcast days. In practice, undersized solar systems—common on quote-stage estimates—are the biggest cause of service calls after storms.
Controls, access methods, and real-world reliability
Remote, keypad, intercom, and smartphone are all viable, but each introduces a failure mode. Radio remotes are simple and robust. Keypads are fine for short-term guest access but suffer from code sharing and wear. Smartphone integration and cloud services add convenience but depend on Wi-Fi or cellular; plan for a wired keypad or backup radio in case the home network fails. If you want home automation links, choose an operator with documented Z-Wave or API support and verify firmware update policies from the manufacturer such as LiftMaster.
- Security tradeoff: Cloud-connected gates add attack surface; prefer two-factor or local fallback for high-security installs.
- Range and placement: Test remote range from typical approach points; foliage, metal gates, and masonry can reduce effective range.
- Intercom choices: Wired intercoms resist outages and are preferable for waterfront or estate entrances; wireless units are easier but need periodic battery checks.
Safety and code compliance matter in ways homeowners underestimate. Automated gates must meet UL 325 requirements for entrapment protection, use photoelectric sensors (photoeyes), and have appropriate signage. Installers should set force and entrapment parameters per manufacturer instructions and provide a signed test record. A noncompliant installation can increase legal exposure and may void insurance on an injury claim.
Concrete Example: A homeowner in South Tampa chose a solar-assisted operator for a sliding gate to avoid trenching under a decorative driveway. After the first heavy storm the gate stopped operating because the quoted 50 watt panel and small battery were inadequate for repeated cycles. The solution was a hybrid approach: a larger battery bank, a correctly angled panel, and a transfer-ready hardwired connection so the system automatically switches to mains when grid power is available.
Next consideration: before you sign, watch the installer run through an operator demo: remote range, obstruction response, emergency release, and a documented UL 325 test. If the demo is informal or the installer won’t show settings, assume the job is likely to need follow-up service.
5. Pricing breakdown and realistic Tampa-area cost ranges for gate install
Straight to the point: most budget surprises on a gate install come from site work and the chosen operator, not the decorative metal. Expect your quote to be dominated by footing and electrical scope when the driveway needs trenching, heavy posts, or engineered foundations.
Core cost categories you will see on every quote: materials and fabrication, concrete and foundations, operator and automation, electrical work and conduit, permits/inspections, and labor. Each of these moves independently — change one and several others will shift.
- Materials & fabrication: aluminum, steel, wood, or vinyl and whether the gate is boxed/reinforced
- Foundations & posts: pier diameters, continuous footings for sliding runs, or helical piles in poor soils
- Operator & controls: brand and voltage (120V vs 24V vs solar) and accessory controls
- Electrical & trenching: conduit runs, breakers, and possible meter upgrades
- Permits & inspections: county and electrical permit fees plus time to approval
Practical tradeoff: choosing heavier materials like wrought iron or thick steel increases fabrication cost modestly but multiplies foundation and installation costs. Conversely, choosing aluminum lowers both the need for reinforced footings and long-term maintenance spend. In Tampa you will usually save more long-term by spending a little more on the right finish (galvanize + powder coat or marine-grade stainless hardware) than by skimping on the gate itself.
Typical Tampa-area ranges and what they mean
Use these as ordering-level benchmarks, not contract numbers. Manual single-leaf swing: $800 – $2,500. Automated swing (residential operator): $2,500 – $5,000. Sliding gate with automation: $3,000 – $10,000. High-end ornamental or long-span custom installs: $8,000 – $20,000+. Expect permits, electrical hookup, or difficult soil to add $300 – $3,000 or more depending on trenching and panel size for solar systems.
| Line item | Low | High | Notes |
|---|---|---|---|
| 12-ft aluminum sliding gate (fabrication) | $900 | $1,800 | Boxed frame, powder coat |
| Concrete footings & reinforced run | $800 | $2,000 | Includes rebar, anchor bolts |
| Operator + controls (LiftMaster-style) | $900 | $2,500 | 24V or 120V options; backups add cost |
| Electrical work & conduit | $300 | $1,200 | Trenching or panel upgrades increase top end |
| Permits & inspections | $150 | $750 | County plus electrical permit |
| Labor & installation | $600 | $2,000 | Site complexity affects hours |
| Estimated project total | $3,650 | $10,250 | Typical range for this sample |
Concrete example: a Hillsborough County homeowner ordered a 12-foot aluminum sliding gate with a mid-range LiftMaster operator. The quote doubled when the estimator found compacted shell limestone under 6 inches of fill — contractor switched to a deeper reinforced footing and stainless anchors. Final result: longer timeline and a 25 percent increase over the initial ballpark but no callbacks for a misaligned track.
Judgment you need: cheap quotes that omit footing dimensions, operator model, and permit handling are almost always optimistic. Ask for manufacturer anchor specs and a written allowance for unknown subsurface conditions. A slightly higher, detailed quote beats a low bid that becomes change-orders later.
Key takeaway: compare apples-to-apples by requiring line-item footing specs and operator models — that prevents low-ball estimates from becoming expensive surprises.
6. Permits, HOA rules, inspections, and timelines in Tampa
HOA sign-off is the most common project stopper; get it first. Many Hillsborough-area installs are delayed because homeowners pull county permits before a homeowners association review — the result is rework, color or material changes, and lost time. Prioritize the association packet and use its approval letter as part of your permit submission so you do not pay twice for plan changes.
Practical permit steps for Tampa properties
County permit basics: For most residential driveway gate installs you will submit a site plan, post and footing details, and an electrical scope if automation requires hardwiring. See Hillsborough County requirements at Hillsborough County permits. Expect review comments that ask for clarified setbacks, footing depths, or proof of licensed electrical work; responding quickly shortens the approval cycle.
- Documents to prepare: stamped drawings or clear shop sketches, photos showing curb-to-gate measurements, product cut sheets for operators and hardware.
- Electrical addendum: electrician name, breaker location, conduit routing, and whether a separate electrical permit is necessary.
- HOA packet: finish samples, elevation drawings, and a brief installation timeline so the board can visualize the finished work.
Inspection focus and common pain points: Inspectors typically confirm setbacks, verify concrete pier depths and reinforcement, and check that any electrical work meets local code. A frequent on-site failure is mismatched footing notes: installers pour a shallow pad and the inspector requires deeper piers per the approved plan — that triggers a stop work order until corrected.
Trade-off to accept: pushing a custom look through an aggressive timeline increases the odds of plan revisions. If you need the gate installed quickly, choose finishes and operator models that match your HOA standards and local permit templates; that speeds approvals but narrows custom options.
Concrete Example: A South Tampa homeowner ordered an ornate iron driveway gate and filed directly for county permits. The HOA rejected the dark oil-rubbed finish and required a lighter powder-coat sample. The contractor had to revise drawings and delay the electrical inspection, adding weeks and two re-inspection fees before final sign-off.
Next consideration: if your property has tricky soils, shoreline exposure, or unusual setbacks, hire a local gate installer who handles permit submissions and inspections — it shortens the schedule and transfers risk. See Vilo Fence for examples of handled permit packages at Vilo Fence gate installation.
7. Maintenance, warranties, and long-term total cost of ownership
Simple truth: an affordable gate install can become expensive over time if you ignore maintenance, warranty fine print, and the real replacement triggers. Routine service and correct finish/spec choices are the only reliable ways to control lifetime cost for gates in Tampa salt air.
What actually drives lifetime costs
Operational costs vs. capital costs: initial fabrication and electrical work are visible on the estimate; the harder costs show up later as operator repairs, corrosion touch-ups, battery replacements, and foundation fixes. For automated systems, expect labor calls and parts replacements to be the recurring budget items — not paint.
Warranty realities to watch for: manufacturer warranties typically cover defects in the operator or fabricated gate for a defined period (often 1 to 5 years), but installers often supply separate labor warranties. Important limitation: coastal corrosion and consequential damage from improper finishes are commonly excluded unless the quote explicitly specifies marine-grade galvanizing, powder coat thickness, and stainless fasteners.
- What to confirm in writing: operator brand and model, exact warranty periods for parts and labor, exclusions for salt corrosion, and required maintenance actions that keep warranties valid
- Service plan elements that matter: scheduled safety testing (UL 325 check), battery replacement intervals, lubrication notes, and documented emergency-release training
- What voids warranties fast: colored finishes applied over powder coat, mechanical damage, or skipped UL 325 annual safety tests
Practical tradeoff: prepaying for an annual service plan increases upfront cost but reduces surprise bills and preserves warranty coverage. If you plan to sell the property within a few years, an extended parts warranty can be a selling point — otherwise, prioritize documented routine inspections and solid finishes.
Concrete example: a Tampa homeowner chose a mid-grade steel sliding gate with standard powder coat and no service plan. Year three brought hinge corrosion at cut edges and intermittent operator faults after salt storms. The owner paid for spot sandblasting and recoat plus a replacement gearbox — an unexpected outlay that exceeded the cost of a modest annual maintenance contract and a marine-grade finish at install.
Judgment call installers won't always admit: cheapest immediate repairs and touch-up paint are usually temporary fixes. For coastal installs buy material and finish appropriate for the environment up front, insist on stainless fasteners, and demand that warranty language mention corrosion coverage or explicitly exclude it so you know the risk.
How Vilo Fence can reduce TCO: local installers with maintenance teams shorten response time and know which finishes survive Tampa humidity. Ask for a sample maintenance log and an estimate for an annual UL 325 safety check plus battery replacement schedule; those two items cut most post-warranty failures in practice. See Vilo Fence gate repair options at Vilo Fence gate repair.
Immediate next step: when you compare quotes, add the lifetime line items to the worksheet: scheduled service cost, likely consumables (batteries, remotes), and expected repaint/recoat interval. Compare installers on that total, not just the install price.
8. Real-world examples and two sample project scenarios
What matters most in a real gate install: the intersection of site work and operator choice. You can buy a beautiful gate, but if the footings, post type, or power plan are wrong the system will underperform or require expensive fixes. These two realistic projects show how those decisions change scope, timeline, and final price.
Scenario A — South Tampa narrow driveway, 10-foot single-leaf ornamental aluminum gate
Profile: tight alley approach, limited lateral clearance, homeowner wants low-maintenance and no trenching. Decision rationale: lightweight aluminum reduces hinge torque and lets a solar-assisted 24V operator work without mains power if sized correctly.
- Line-item estimate: fabrication and boxed aluminum frame $1,100
- Concrete pier, small pad, and stainless anchor bolts $1,200
- Solar-capable 24V operator, larger battery bank $1,400
- Labor and install day work $900
- Permits and HOA filing allowance $350
- Estimated total: $4,950
Tradeoff and limitation: solar eliminates trenching but requires a correctly sized panel and battery bank — undersize it and you solve one problem and create another after a few storm cycles. For narrow drives a single swing leaf is cheaper to maintain, but hinges must be heavy-duty and occasionally adjusted; cheaper hinge hardware is a common short-term failure point.
Scenario B — East Tampa waterfront, 16-foot sliding galvanized steel gate with heavy FAAC operator
Profile: exposed salt air, higher security needs, broad vehicle accesses, and a wish for masonry finish to match a stone wall. Decision rationale: steel provides rigidity and perceived strength; masonry posts resist salt and impact better than timber, but both increase required footing work.
- Fabrication of 16-foot galvanized sliding gate with boxed rails $3,200
- Continuous reinforced footing and two masonry piers $4,500
- Heavy-duty FAAC sliding operator and controls $3,600
- Electrical run, conduit, and dedicated breaker $1,800
- Labor, finish, and final adjustments $2,200
- Permits, engineer note, and contingency $700
- Estimated total: $16,000
Practical insight: heavier materials solve deflection and give a better security profile, but they multiply foundation and masonry costs. On waterfront lots plan for stainless fasteners, sacrificial detail at cut edges, and a higher maintenance cadence — these raise the install price but reduce mid-term repair bills.
Real-world application: a homeowner who wanted a masonry-clad entrance specified steel rails and masonry posts; the engineer required continuous reinforcement under the sliding run because of a high water table. The extra foundation scope added time but kept the track aligned through seasonal settling and avoided a derailment that would have required a second concrete pour.
How to map these examples to your project: if your driveway is constrained pick a single swing leaf with a well-specified operator and plan for solar only with explicit panel and battery specs. If you need long spans or heavy duty security, budget for reinforced continuous footings and masonry posts and accept higher labor and timeline. Always require operator model numbers and foundation specs on the quote so you can compare bids honestly.
Next consideration: before you sign, insist on an itemized change-order policy and a 10-15% contingency for permit or subsurface surprises; that is where most budgets shift in practice.
9. Preparing for the installer and what to expect on site during installation
Be practical about logistics before day one. The single biggest cause of delays is preventable site friction: no place for material delivery, blocked access, or unclear utility locations. Arrange a single point of contact who can make on-the-spot decisions and confirm parking for the crew and a safe laydown area for gate panels and concrete materials.
Homeowner prep checklist (practical items installers will expect)
- Clear a 20-foot delivery and staging zone: keep cars, garbage bins, and play equipment away from the driveway.
- Mark known utilities and sprinkler heads: if you have an irrigation map, leave it for the crew; if not, schedule an 811 locate before heavy digging.
- Protect surfaces: lay plywood over soft turf and driveways where heavy trucks or mixers will work.
- Pets and pedestrian routes: secure animals and post temporary pedestrian routing if your gate opening crosses a walkway.
- Power & access for electricians: point out the main panel and any preferred conduit routes or meter access.
Tradeoff to accept: more homeowner involvement up front (clearing a staging area, moving a gate post, or temporarily disabling irrigation) speeds the job and reduces contractor contingency. If you want a hands-off approach, expect a longer timeline and higher line-item allowances on the quote.
Typical on-site sequence and what the crew will do
Day one usually focuses on layout and excavation. Crews will stake the gate line, verify clearances, cut or remove short sections of existing fencing if needed, and excavate for piers or the sliding run. If concrete is scheduled that day they will set rebar cages and pour; otherwise you'll see discrete excavations with protective covers if rain threatens.
Follow-up days cover fabrication fit and electrical. Expect metal fitting, hinge and roller alignment, operator pad anchoring, conduit runs, and control wiring. Installers commonly program remotes and test safety devices in the final phase—plan to be present for operational demos.
Commissioning matters more than most homeowners realize. Require the installer to demonstrate at least one full obstruction test, show how the emergency release works, register serial numbers for warranty, and hand over a labeled packet with operator manuals and spare fuses or remotes. Verbal demos are weak protection—insist on written acceptance and a short recorded checklist.
Handling surprises on site. When crews uncover unexpected items like irrigation lines, abandoned conduits, or shell rock, a professional installer documents conditions, takes photos, and issues a written change-order with options. Avoid contractors who proceed without documentation; undocumented fixes are the usual source of disputes.
Concrete example: A Tampa homeowner scheduled a sliding gate pour but the crew found an old low-voltage irrigation trunk where the footing ran. Work paused, the crew re-routed the irrigation, upsized the footing by 30 percent, and supplied a written change-order. The result was a two-day delay and a clear paper trail that avoided later disagreement about scope and cost.
Next consideration: coordinate permit placards and HOA notifications ahead of time and include them in the installer scope. If you want less hassle, choose an installer who handles HOA submissions and permit pickup—this saves time but costs more, and in practice it prevents the most common admin delays documented by Hillsborough County at Hillsborough County permits. For local examples and a sample pre-install checklist see Vilo Fence gate-installation.
10. Next steps and how Vilo Fence can help
Concrete fact: the single biggest driver of a clean, on-budget gate install is clear information at the estimate stage. When you supply focused photos, measurements, and power access details a gate installer can rule out major unknowns, price correctly, and reduce the chance of change-orders on a residential gate installation.
What to prepare before you contact an installer
- Photos: approach from the street, curb-to-garage, and both sides of the proposed gate line so the estimator sees lateral clearance and obstacles.
- Measurements: clear opening width, driveway slope over the first 10 feet, and distance to the main electrical panel or nearest outlet.
- Site notes: indicate irrigation lines, visible conduit, trees, or retaining walls that could affect excavation or foundation choices.
- HOA paperwork: a copy of relevant CC&R excerpts or prior approvals to speed review and avoid rework.
Practical limitation – photo estimates are fast but not final. Photographs let an installer provide a confident ballpark, but subsurface surprises like shell rock or hidden utilities still require an on-site check. Treat a remote quote as contingent until an estimator verifies footing conditions in person.
How Vilo Fence approaches your gate install estimate. We start with a remote pre-screen from your photos, then schedule a time for a measured site visit. The written estimate includes an annotated site sketch, scoped line items for foundations and electrical, recommended operator options, and an expected timeline with permit responsibilities clearly noted.
Concrete example: A homeowner in South Tampa sent photos showing a narrow, slightly sloped driveway and indicated no nearby mains power. Vilo Fence used that to size a solar-capable 24V operator, call out a low-profile hinge solution, and submit an HOA packet before the site visit. That coordination cut the overall schedule by eliminating two rounds of design changes and clarified the final price before fabrication began.
- Questions to ask any installer before you sign: What is your local references list for similar projects in Tampa? Who handles permit and HOA submissions and at what cost? What are your payment milestones and change-order procedures? What is your emergency response SLA after commissioning? Do you provide a commissioning report with safety tests and serial numbers?
Next consideration: attach your photos and HOA excerpt when you contact Vilo Fence via Contact or request a local site visit at Vilo Fence gate installation so the estimate won’t be an optimistic placeholder. Real quotes start from documented site facts, not best guesses.