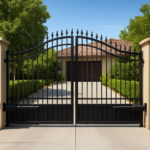
If you searched wood fence repair near me because your fence is sagging, the posts are soft at the base, or panels blew out in a storm, this guide is for Tampa homeowners and property managers. You will get a fast inspection checklist, step-by-step DIY fixes for rotted pickets and loose posts, realistic cost and timeline ranges, and plain rules for when to call a professional. The advice focuses on materials and hardware that withstand Tampa humidity, sandy soil, and coastal corrosion so repairs actually last.
1. Fast inspection checklist to decide DIY or professional help
Start with a quick claim: a five minute inspection will tell you whether you can reasonably DIY or should call a pro. Walk the line, take pictures, and run three simple tests described below before buying materials or renting equipment.
Quick 5-minute inspection
- Visual scan: note leaning panels, visible rot at ground line, cracked concrete footings, sagging rails, or missing fasteners.
- Probe test: jab a screwdriver into post and rail at ground level and 6 inches above. Soft, crumbly wood beyond 1 inch is a fail for that component.
- Push test: push on each panel mid-span. If the panel moves and the post shifts, the post or footing is the problem, not the pickets.
- Sound test: tap boards and rails with a hammer – hollow or dull sounds can mean internal decay or termite damage.
- Hardware check: look for heavily rusted nails, split connectors, or stripped screw heads at hinges and rail connections.
Decision thresholds matter. If you find one isolated soft picket or loose screw, that is a DIY fix. If two or more posts show deep rot, or three adjacent panels lean, budget for professional work – those are structural failures that DIY patching rarely fixes for the long term.
Trade-off to accept: DIY saves money on small, cosmetic, or single-component repairs but often uses temporary fixes that leave underlying problems – poor footings, soil washout, or corroded connectors – unaddressed. Professionals charge more up front but replace failing footings and use corrosion resistant hardware that prevents repeat trips.
Concrete Example: A Tampa homeowner found a single 6 foot panel with a rotten bottom rail and replaced the rail and two pickets over an afternoon for about 80 in materials. Another property had three consecutive posts with post bottoms gone; that job required post excavation, new concrete footings, and panel rehangs and cost roughly 1200 when handled by a contractor because the scope included machinery and permit checks.
Common mistake: people replace pickets and ignore the post. Picket replacement is tempting because it is quick, but if the post or footing is compromised the new boards will fail within a season in Tampa humidity. Address the load-bearing parts first.
Next step: take dated photos, note which posts failed the probe test, and measure post spacing and panel height. If your notes hit the decision thresholds above, call a pro for a site estimate; if not, move to the tools and materials checklist in the next section and plan a targeted DIY repair.
2. Tools, materials, and protective gear for wood fence repairs in Tampa
Start with the right priorities: corrosion resistance, correct footing tools, and personal protection are more important than the fanciest saw. In Tampa the real failure modes are wet wood and rusty hardware; bringing stainless or hot dipped galvanized connectors, a reliable concrete mix, and proper digging tools will save you repeat trips.
Task-focused kit instead of a generic tool list
| Repair Task | Must-have tools | Preferred materials / hardware |
|---|---|---|
| Post replacement or reset | post hole digger or 4 inch power auger rental, digging bar, pry bar, sledge, level | pressure treated 4×4 or 4×6 post, Quickrete, 3 inch gravel pad, Simpson Strong Tie post base (ABU/BCB), stainless carriage bolts |
| Picket and rail replacement | reciprocating saw, circular saw, drill/driver, speed square, clamps | western red cedar or pressure treated pine, stainless or hot dipped galvanized screws, end-cut preservative |
| Cutting, shaping, and small rot repairs | random orbital sander, chisel set, epoxy applicator, shop vacuum | Abatron WoodEpox or similar consolidant, Minwax filler, exterior primer and stain |
| Hardware and gate work | torque screwdriver, adjustable wrench, impact driver | stainless hinges, galvanized gate hardware, stainless screws for coastal sites |
Safety and site prep are non-negotiable. Use eye protection, hearing protection, heavy-duty gloves, and a NIOSH-rated respirator when cutting pressure treated lumber or epoxy. Call 811 before digging for post footings and keep a dedicated container for treated wood waste; Florida disposal rules vary and sawdust can contain chemical preservatives.
Trade-off to accept: stainless fasteners cost more up front but outlast hot dipped galvanized in coastal or high-humidity zones. For most Tampa repairs the extra material cost is cheaper than repeating the same repair in two years. If budget is tight, choose stainless for structural fasteners (posts, rails, connectors) and galvanized for non-structural picket screws.
Concrete Example: A homeowner in South Tampa replaced a rotten post by renting a 4 inch auger, cutting the old post with a reciprocating saw, and setting a new pressure treated 4×4 on a 4 inch gravel pad with Quickrete and an ABU post base. The job took a half day with one helper; materials and a one-day tool rental ran under 200 and the owner avoided a contractor visit because they used corrosion resistant hardware and presealed cut ends.
Practical judgment: epoxy consolidants are useful for cosmetic or localized rot on pickets and rails but do not restore load-bearing capacity at a rotted post base. When the post bottom is compromised, plan to dig and either replace or sleeve the post and use a mechanical post base. That is the line between a short term patch and a durable repair.
3. How to repair rotted pickets and rails step by step
Immediate reality check: most picket and rail rot is repairable when the posts and rail framing are still solid. Replace boards when the structure is sound; replace structure when the rails or posts fail the probe and push tests.
Scope the damage precisely
Practical test: probe the bottom of the rail and the rail-to-post connection with a screwdriver and measure wood moisture with a small meter if available; wood moisture above ~20% plus soft feel means active decay. If the rail deflects under push pressure or the post moves, you are beyond board repair.
Repair small, local rot with consolidant (when framing is good)
- Remove failed wood: cut back to firm wood with a chisel or saw and clean out all loose fibers until you reach solid, dry timber.
- Dry and treat: let the area dry (fans help), then brush on a wood preservative to the exposed end grain and surrounding area.
- Consolidate and fill: inject a two-part epoxy consolidant such as Abatron WoodEpox into the damaged cavity, pack with epoxy filler to shape, cure per directions, then sand flush.
- Fasten and reinforce: screw a stainless steel or hot-dipped galvanized plate or small sister piece under the rail with 2 1/2 inch #8 exterior screws to restore shear strength if the rail carries load.
- Finish: prime exposed epoxy and raw wood, then stain or topcoat with an exterior product like Benjamin Moore ARBORCOAT.
Trade-off to accept: epoxy fixes cosmetically and can restore shape, but it does not restore original fibrous pullout strength. Use it where the rail is not the primary load path or when you add mechanical reinforcement.
Replace a full picket or rail (durable, low-fail risk)
- Remove the damaged board: unfasten screws or cut nails and slide the board out without stressing adjacent boards or rails.
- Match and cut: rip a replacement from pressure treated pine or cedar to the same profile; seal all cut ends with end-grain preservative.
- Fit and fasten: predrill and attach pickets with 1 1/4 to 1 5/8 inch stainless deck screws; for rails use 3 inch stainless structural screws or carriage bolts where rails meet posts.
- Protect the contact point: raise the bottom of pickets/rails 1/2 to 1 inch above grade where possible, or install a thin aluminum saddle/flashing on the top of the bottom rail to shed water.
- Blend and cure: allow wood to acclimate, then stain the new board to match. New wood will weather differently; overlap staining cycles rather than forcing a perfect immediate match.
Real-world use case: a small rental complex in Tampa had repeated bottom-picket failures from lawn-sprinkler spray. Crew replaced five bottom pickets and added a 1/2 inch gap to grade plus an aluminum drip on the bottom rail; the repair stopped recurring rot despite heavy irrigation.
Practical judgment: homeowners often choose the cheapest screws and then wonder why new boards fail. Spend on stainless for structural fasteners; save on non-structural picket screws if you must economize. The extra upfront cost prevents repeat work in a humid coastal climate.
4. How to repair or replace loose or rotted posts
If a post moves where it meets the ground, the fix has to address the footing or the post will fail again. Patching pickets or tightening screws around a loose post only delays the real work. Start by isolating whether the wood itself is the problem, the concrete has crumbled, or the connector hardware has rusted through.
Diagnose before you dig
Quick diagnosis: probe the post at ground level, push the panel to see if movement is at the post base, and look for cracked or honeycombed concrete. If the decay or movement is limited to the bottom few inches of the post, a sleeve or post base can work. If the rot climbs above that point or the concrete disintegrated, plan to replace the post and footing.
- Re-anchor with a new footing: replace the failing concrete and set a new pressure-treated or decay-resistant post. This is the most durable option but takes the most time and requires excavation.
- Sleeve or jack it up with a metal anchor: useful when space is tight or you need a same-day wood fence repair. Faster and cheaper short term, but sleeves must be installed with drainage and corrosion-resistant hardware to avoid trapping moisture and causing renewed rot.
- Sister a new post: install a new post alongside the old one when alignment and finish tolerances allow. Good when the old post still helps transfer some load and you want to avoid removing panels, but it can complicate panel reattachment and looks bulkier.
Trade-offs matter. A metal sleeve or post base gets a yard usable again the same day and often shows up on lists for same day wood fence repair or emergency wood fence repair, but it is rarely the best long-term answer if the surrounding concrete and soil are failing. Full replacement is slower and costs more up front, yet it eliminates hidden decay and lets you install corrosion-resistant connectors appropriate for coastal humidity.
Practical constraint to plan for: Tampa sandy soils shift differently than clay; you will often need to remove contaminated fill and recompact, not just pour new concrete on top of cracked footing. If utilities are nearby, call 811 before digging and consider hiring a pro for safe excavation.
Concrete Example: After a tropical squall, a small commercial property had two adjacent posts lean and panels sag. A crew excavated the failed footings, lifted the panels, and replaced both posts with decay-resistant lumber seated on compacted gravel and new concrete footings; the job took a morning and restored panel line straightness and gate alignment. The owner chose full replacement because previous short-term sleeves had failed twice in high-spray irrigation locations.
What homeowners commonly misunderstand: people assume a metal sleeve is a permanent cure. In practice, sleeves that are not properly flashed and drained become moisture traps and accelerate rot at the sleeve top. If you accept a sleeve for speed, budget follow-up inspection and possible replacement within a few years unless the sleeve is installed with a dedicated drainage path and stainless or hot-dipped galvanized connectors.
Next consideration: if multiple posts are failing or panels are consistently leaning, this is a structural problem—get written estimates that list materials, connectors (look for Simpson Strong Tie or similar), and whether the contractor handles permits. That separates a quick patch from a reliable, long-lasting repair.
5. Replacing entire fence sections and matching existing style
Straight fact: replacing a full section is often the cheapest path to a convincing match—trying to patch spot-by-spot usually leaves visible seams in profile, spacing, and weathering. When panels, rails, or multiple posts are compromised, treat the work as a small replacement project rather than a cosmetic touch-up.
Measure, document, and decide scope before cutting anything
What to record: photograph the fence from multiple angles, measure panel width, post center-to-center spacing, picket width and gap, rail positions, and note any decorative headers or capboards. Bring a physical sample or a clear close-up photo to the lumber yard; digital color alone lies.
- Match priorities: match scale and spacing first, grain/color second. If you can replicate the picket profile and spacing the eye accepts new wood more readily than a near-perfect color match.
- Milling options: consider ordering custom-milled pickets to match a routed profile, or use a router and jig on-site when only a few boards differ; custom milling raises cost but avoids awkward visual joins.
- Reuse posts with care: you can often reuse sound posts, but cut back 3 to 6 inches and inspect for hidden rot at the rail attachment points before rehanging rails.
Trade-off to accept: exact color matching requires either replacing a longer run or accepting a staged weathering plan. Replacing additional contiguous panels to create a uniform new section looks better and can be more cost-effective than custom color-matching treatments.
Finish, blend, and practical tricks that work in the field
Fast blending: tint the first coat to a mid-tone slightly darker than the weathered fence, install panels, then let them sit uncovered for 4 to 8 weeks to knock back the fresh-wood sheen before applying the final topcoat. This staged approach beats frantic color matching at the truck.
Edge details: copy spacing and shadow lines exactly where panels meet posts. Small differences in reveal (1/8 to 1/4 inch) are more noticeable than slight color mismatch. Use routed trim or simple 1x capboards to create a consistent top line if the original cap is missing or damaged.
When to widen the repair: if matching requires custom milling or specialty wood (western red cedar vs pressure treated pine), replacing three to five panels in a run usually gives the best balance of appearance and cost—less visual patching, fewer callbacks.
Real-world example: A homeowner in Tampa had three consecutive 6-foot panels with blown rails after a storm. The original fence was older cedar weathered to gray while adjacent runs were pressure treated. Crew replaced the three panels in cedar, installed matching routed pickets, applied a tinted first coat, and left the new section to weather four weeks before the final coat. The result read as intentional rather than patched, and the owner avoided replacing large adjacent runs.
Practical judgment: prioritize profile, spacing, and shadow lines over exact color matching. If you want a flawless look, accept the cost of replacing a longer contiguous run or plan a staged refinishing schedule.
6. Preventive maintenance practices that extend fence life in Tampa
Do scheduled upkeep or plan for replacement sooner — there is no middle ground in Tampa. High humidity, salt air in coastal neighborhoods, and frequent storms accelerate hidden failures; owners who treat maintenance as occasional chores end up paying for full panel or post replacements.
Seasonal maintenance framework tailored to Tampa
- Late spring (pre-storm): walk the line, tighten gate hardware, torque through-bolts at posts, replace any corroded connectors, and seal fresh cut ends with an end-grain preservative so boards resist the summer monsoons.
- Early fall (post-storm): look for shifted posts, pulled fasteners, and cracked footings; unhook sagging gates and inspect hinge plates for bending or rust before rehanging.
- Annual winter check: remove vine growth and clear soil or mulch away from the bottom of boards, apply a mildew wash where needed, and touch up the stain or sealer on exposed end grain.
- Every 3–5 years: have a licensed pest pro inspect for subterranean termites and carpenter ants and consider an on-site review by a qualified fence contractor for footing integrity and connector corrosion.
Concrete Example: A Tampa homeowner booked a May pre-season check after noticing a slightly noisy gate. The crew found two partially corroded carriage bolts at the gate post and replaced them with stainless through-bolts, realigning the gate in the same visit. Preventive spending that morning (about 85 in parts and labor) avoided a weekend gate removal and a panel rehanging job that would have cost several hundred dollars and days of disruption.
Practical trade-off: prioritize corrosion resistance for load-bearing connections first. Spending on stainless bolts and Simpson-style connectors for posts and rails costs more up front but reduces call-backs; economy coated screws are acceptable for non-structural pickets when budget is tight. Expect the break-even on upgraded hardware in Tampa to be a few years, after which you will have avoided repeat repairs.
Simple, high-impact actions you can do yourself: shut off nearby sprinkler heads or redirect spray away from the fence line, keep at least a small rock or gravel strip under post bases where feasible to help surface drainage, remove soil or mulch piled against boards, and re-stain or re-seal exposed end grain annually. These small steps materially slow rot and hardware corrosion and reduce the frequency of searches for wood fence repair near me.
What people underestimate: maintenance prevents many, but not all, failures. If footings are undermined or posts are past the point of sound wood, upkeep only postpones the replacement bill. Use seasonal checks to catch early signs; when you see multiple cracked footings or moveable posts, plan for excavation rather than more surface maintenance.
7. Typical costs and timelines for common wood fence repairs in Tampa
Reality check: repair quotes aren’t just material plus labor — they bundle travel, disposal, connector upgrades, and risk. Expect small fixes to be quick and inexpensive only when the underlying footing and connectors are sound; once footings or multiple posts are involved, time and cost jump because excavation, compaction, and corrosion-resistant hardware become mandatory.
Cost components to watch
Breakdown matters: labor (crew hours), materials (lumber, concrete, anchors), mobilization (minimum call-out), and extras (permits, utility locates, dumpster). Cheap quotes often omit stainless connectors or use thinner concrete mixes — that saves now and guarantees a callback in Tampa’s humidity.
- Mobilization/Minimum: many local contractors have a minimum charge to cover travel and setup — expect this to appear on small jobs.
- Materials premium for coastal durability: stainless or hot-dipped galvanized connectors add to cost but reduce repeat repairs in salt air.
- Permits and inspections: replacing panels that alter height or setbacks can trigger a permit fee and inspection window.
- Emergency or same-day work: rapid response typically carries a surcharge and may limit the depth of excavation possible that day.
Typical timelines (what professionals actually schedule)
| Repair type | Typical on-site duration | Booking lead time |
|---|---|---|
| Single picket or short rail replacement (no post work) | 1–3 hours | Same day to 3 business days |
| Single post replacement with excavation and new footing | Half day to full day | 2–7 business days (longer in hurricane season) |
| Full 6-foot panel replacement or multiple post replacements | 1–2 days | 3–14 business days depending on crew availability and permits |
| Emergency storm repair to re-secure panels/gates | Same day temporary fixes; permanent repair later | Same day temporary; permanent schedule varies |
Timing nuance: Tampa’s busy season around hurricane months pushes lead times and can raise labor rates. If you need a same-day wood fence repair, expect a premium and, often, a short-term sleeve or anchor rather than a full footing replacement that requires excavation and curing time.
Practical trade-off: choosing a quick sleeve or metal anchor gets the yard functional immediately and is cost-effective short term, but it often defers the deeper problem. If you plan to sell the property or want long-term durability, invest in full post replacement with proper footing and stainless connectors up front — the per-post cost generally falls when you bundle multiple replacements.
Illustration: a mid-Tampa homeowner called for two failing posts that wobbled. A contractor scheduled the job in five days, excavated the old footings, replaced both posts on compacted gravel, and poured new concrete; crew time was a full morning and the job required a 24–48 hour setback for concrete cure before reattaching panels. The owner paid for a multi-post slot rather than two separate mobilizations, which lowered the per-post price and produced a durable result.
What to ask for when you get quotes: insist on itemized pricing (materials, labor hours, mobilization), a timeline that includes concrete cure or staged work, and a written warranty that names hardware types (for example, stainless fasteners and Simpson Strong Tie connectors). If the contractor will handle permits, have that stated and costed separately.
8. When to call a professional and how to choose a fence contractor in Tampa
Call a pro when the failure is structural, creates a safety or security risk, or when permits and utilities are in play. Small board or hardware fixes are DIY-friendly; anything that involves multiple posts, undermined footings, or repeated failures should be treated as contractor work.
Concrete triggers that justify hiring a contractor
Structural problems hide under weathered boards. If you see more than two adjacent posts failing, panels leaning across several spans, a gate that no longer latches and threatens injury, or exposed utilities near the post line, stop planning a weekend fix and call for professional wood fence repair services.
- Immediate safety or security risk: panels fallen onto sidewalks, gates that can slam shut, or a fence down after a storm requiring emergency wood fence repair.
- Multiple failed posts or footings: this is a structural issue, not a cosmetic one — temporary sleeves may be offered but are often short-term.
- Permit or property-line uncertainty: if the work changes height, location, or could trigger inspections check with the City of Tampa and use a contractor who handles permits.
- Commercial property or HOA constraints: businesses and managed properties need contractors who provide insurance certificates, warranties, and documented code compliance.
A practical hiring rubric for nearby wood fence repair
You do not need the lowest bid; you need clarity. Ask for an itemized proposal that names materials, footing depth, connector brands, and a timeline that accounts for concrete cure. Prefer bids that call out stainless or hot-dipped galvanized hardware, Simpson Strong Tie-style anchors, and who will pull permits.
- Verify credentials: proof of insurance (GL and workers compensation) and a local business license or registration.
- Demand specifics: footing depth, post size and species (pressure treated or cedar), and exact fastener types — vague language is a red flag.
- See local work: request recent Tampa references or photos of similar repairs in comparable soil and coastal exposure.
- Compare warranties: material plus labor terms in writing; short-term promise without details is not useful.
- Confirm logistics: mobilization fee, disposal plan, whether the contractor calls 811, and expected cure/closure dates.
Trade-off to weigh: same day wood fence repair or emergency fixes restore function quickly but often use sleeves or anchors that are temporary. If you value speed for security, accept a planned follow-up for permanent footings and stainless connectors; if you want one lasting job, schedule a full replacement with proper excavation even if it costs more and takes longer.
Concrete Example: After a thunderstorm a Tampa homeowner searched wood fence repair near me and booked a same-day crew to brace and rehang two panels so the yard was secure. The contractor documented the temporary fixes and scheduled a permanent post replacement two weeks later that included new concrete footings and stainless base plates — preventing repeated callbacks in the heavy-spray irrigation zone.
Practical judgment: cheap, non-specific quotes usually cut corners on fasteners and footings. Pay more for clear specs and local experience; it is the difference between a one-season fix and a durable repair in Tampa humidity.