Professional Fence Repair Services Near You: Expert Solutions for Every Type of Fence
When storm damage, rot, or coastal corrosion compromises your fence, a good fence repair company near me in Tampa saves time and money. This guide lays out material-specific fixes for wood, vinyl, chain link, aluminum and wrought iron, realistic Tampa Bay cost and timeline ranges, permit and insurance pitfalls, and a contractor vetting checklist. Read on to learn what to document for accurate quotes, when repair makes sense versus replacement, and how to get fast, reliable service from local fencing experts.
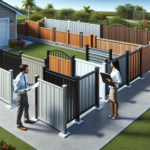
Why choose a local fence repair company near me in Tampa
Local presence matters more than a low bid. Searching fence repair company near me should be about more than price — it should prioritize fast response, accurate site knowledge, and contractors who actually show up when a permit or insurance inspector needs to visit.
Tampa-specific conditions change the work. Sandy soils, hurricane-force winds, and saltair corrosion require different post depths, fasteners, and coatings than inland jobs. A nearby contractor will already be using the anchors, stainless or hot-dipped fasteners, and coatings that survive local exposures instead of generic, off-the-shelf fixes.
Practical trade-offs and what to expect
Trade-off: faster emergency response versus schedule congestion after storms. Local companies provide quicker temporary stabilization and documentation for claims, but they also get booked fast after hurricanes. If you need same-day fencing repairs near me, confirm availability and ask about temporary bracing or tarping before any full repair is scheduled.
Why permits and local relationships matter. A local team understands City of Tampa permit nuances and common HOA conditions, which shortens approval time and avoids rework. If your repair affects a property line or requires structural replacement, that institutional knowledge saves weeks and extra cost — check the City of Tampa permit guidance at City of Tampa Building Permits.
Concrete example: After a recent coastal storm, a homeowner called a nearby contractor for emergency support. The crew stabilized leaning posts with temporary braces, documented damage for the insurer, and scheduled permanent replacement that specified longer concrete footings and marine-grade fasteners. The insurer approved the claim faster because the contractor provided the required photos and measured post schedules.
A practical warning. Many property owners assume any fencing crew can patch visible damage. In practice, low-cost responders often use shallow post holes and standard screws that fail within two seasons in saltair environments. Ask for evidence of local experience with wood fence repair, aluminum corrosion control, or the specific material you have, not a generic repair promise.
Next consideration: before you request bids, gather three photos (wide, close on damaged posts, and hardware) and note whether the fence borders an HOA or public right-of-way — those details determine which local rules and permit paths apply.
How to diagnose fence damage and decide between repair and replacement
Key point: the single most decisive factor is the condition of the posts and footings. Panels, pickets, or rails are replaceable; failing posts and footing collapse the whole system and usually drive the decision toward replacement.
On-site diagnostic framework
- Start with a perimeter walk. Look for continuous lean, gaps at grade, pulled or missing fasteners, and corrosion streaks on metal hardware.
- Probe and push test. Push each panel and wiggle each post. If a post moves more than an inch at the top or the panel shifts independently of the post, the footing or post is compromised.
- Check below grade. Where possible, excavate a small patch beside a suspect post to inspect concrete, rot lines, or soil washout. Surface appearance can be misleading.
- Inspect gates and hardware under load. Gate misalignment often signals post movement, not just a bad hinge.
- Assess corrosion and rot extent. For metal fences, look for through-thickness loss or perforation; for wood, check for rot extending past the post base and into the rail.
Trade-off to consider: repairing isolated components is cheaper now but can leave you paying repeat labor if the root cause is poor footings, saltair corrosion, or widespread insect damage. Spending more up-front on proper post replacement or upgraded fasteners often saves money over three years.
Real-world use case: A landlord had three separated privacy panels on a rental that fell after a storm. A quick crew replaced the panels but left the decayed posts. Two months later another panel failed. A professional crew excavated, found termite damage at three post sockets, and recommended full post replacement with concrete footings and stainless fasteners. That one-time investment prevented recurring tenant service calls and a larger replacement later.
If more than two adjacent panels or 25-30% of posts show structural failure, plan for replacement rather than piecemeal repairs.
When to call a pro right away. Contact a licensed local contractor if the fence secures a pool or business entry, if multiple posts lean, if posts show hollow rot or through-thickness corrosion, or if the fence is on a property line where professional documentation will affect an insurance or HOA decision. For Tampa permit questions consult City of Tampa Building Permits and bring your site photos to the inspection.
Next consideration: when you gather photos for a quote, include a head-to-toe wide shot, a close-up of suspect posts at ground level, and one showing adjacent property or hazards. That set lets nearby fence repair services give a realistic preliminary assessment and reduces lowball estimates that miss hidden footing work. For local help with a site inspection, see Vilo Fence services.
Material specific repair solutions
Different materials fail for different reasons — fix the failure mode, not just the visible damage. Cosmetic panel replacement on a system with compromised posts or corroded fasteners is a short-term expense, not a repair. When you search for a fence repair company near me, the first question to ask is how they diagnose below-grade and hidden hardware issues for your fence type.
Wood fence repairs
Focus: post sockets and footing integrity. Sistering a post works when rot is limited above the footing; full post replacement with properly sized concrete footings and pressure-treated or decay-resistant posts is the right call when rot reaches the base. Use stainless or hot-dipped galvanized fasteners in coastal locations to avoid repeat failure.
Vinyl and composite panel fixes
Focus: connection points and UV/impact damage. Vinyl panels are often replaced individually; however collapsing posts require reinforcement or replacement with an internal steel post sleeve. Composite panels look durable but are product-specific; expect manufacturer fasteners and limited field welding options — matching color and profile can force section replacement rather than spot repair.
Chain link, aluminum, and wrought iron
Focus: tension, rail continuity, and corrosion control. Chain link repairs are mostly tensioning, top-rail replacement, and resetting posts in concrete. Aluminum and wrought iron respond to straightening, picket replacement, and welding, but near the coast you must address galvanic corrosion: strip to sound metal, use a zinc-rich primer, and finish with powder coating or marine-grade paint. Replace common steel bolts with 316 stainless at any salt-exposed site.
Practical trade-off: welding and refinishing metal sections is cheaper than full replacement but rarely returns a corroded run to a long-term, warranty-ready state. For security or pool barriers, replacement with new, properly coated sections is usually the responsible investment.
Concrete example: A South Tampa homeowner had pitted aluminum pool panels after three years of salt spray. The repair team removed affected panels, sandblasted to bright metal, applied a zinc-rich primer and professional powder coat, and swapped all fasteners to 316 stainless. The fence passed the pool safety inspection and the owner avoided a full-line replacement for several more years.
What most people get wrong: contractors often quote panel costs and ignore the hardware and footing work that drives longevity. In practice, spending on correct post replacement and marine-grade fasteners saves more than multiple cosmetic repairs. When you call a local nearby fence repair expert, insist that the written scope separates surface work, post/footing work, and hardware upgrades so you can compare apples to apples.
Fence repair process step by step
Start strong: a professional repair is a sequence, not a single afternoon of work. Doing steps out of order wastes money and often voids insurance or permit conditions. Expect a clear, documented workflow from any fence repair company near me you consider.
Step 1 — initial contact and what to provide
What speeds things up: send three labeled photos and basic measurements before the visit. Provide a wide shot of the line, a ground-level close up of damaged posts or hardware, and a photo showing any gates or pool proximity. Also include linear footage, gate width, and whether the line borders an HOA or public right of way.
- Essential info to attach: wide, close, and context photos
- Measurements: estimated linear feet and number of posts or panels
- Site notes: pool or commercial access, vehicle access, known utilities
Step 2 — on site inspection and documentation
What the crew must record: numbered before photos, post spacing, visible footing condition, and any nonvisible risk such as termite activity or through-thickness corrosion. A competent inspector will excavate around one suspect post to confirm footing depth rather than guessing from surface signs.
Practical insight: insist on numbered photos and a short written findings list. That record becomes the baseline for permits and insurance claims and prevents later disputes about what was replaced.
Step 3 — written estimate and scope
What must be in the quote: separate line items for materials, post and footing work, labor, permit fees, and warranty. Look for material grades such as 316 stainless fasteners, specified concrete mix and footing depth, and whether manufacturer parts are required for vinyl or composite panels.
Tradeoff to watch: choosing the cheapest immediate fix instead of addressing footings or corrosion will lower the first invoice but often doubles service calls. Pay attention when a bid bundles everything into one lump sum with no detail.
Step 4 — permits, scheduling and temporary stabilization
Timing reality: some repairs need no permit; structural work often does. If permits are needed, expect at least a few business days for review in Tampa. You can and should have temporary stabilization done immediately if the fence is a safety or security risk.
Insurance note: temporary bracing and thorough documentation speed claim approval. Contractors that delay stabilization to wait for a permit are making a choice that increases your liability risk.
Step 5 — execution, quality checks and final paperwork
Execution sequence that matters: replace or set posts first, confirm plumb and spacing, install rails and panels, then finish fasteners and coatings. Quality checks include gate alignment under load and a post pull test where appropriate.
Final deliverable: before you pay final, get before and after photos, an itemized invoice referencing the original scope, permit closeout documents if applicable, and written warranty terms.
Concrete example: a delivery truck clipped a commercial chain link line in Westshore. The local crew did same-day shoring to secure the perimeter, documented damage with numbered photos, replaced two buckled posts set in full concrete footings, retensioned the fabric, and provided the numbered photo set plus an itemized invoice the business used to settle the insurance claim.
Next consideration: when you call a fence repair company near me, ask how they sequence permit work versus stabilization and demand the numbered photo set. That one procedural insistence separates reliable nearby fence repair experts from crews that deliver quick cosmetic fixes with short lifespans.
Costs, timelines, and financing for typical Tampa repairs
Straight talk: expect a broad price band and schedule variability—Tampa jobs move faster when posts and footings are sound, and blow out in cost when hidden below-grade work, corrosion, or permits are needed. Get a written scope that separates material, footing, labor, permit, and disposal lines so you can compare quotes meaningfully.
Typical cost patterns and what actually changes the price
Key drivers: material type, linear footage, number of posts to replace, footing depth, access for equipment, and whether work needs a permit or insurance documentation. Coastal corrosion, sandy soils, and hurricane damage amplify all these factors in Tampa.
| Repair type | Typical Tampa range | Main cost drivers |
|---|---|---|
| Minor panel or picket repair (wood/vinyl) per panel | $150 – $450 | Matching panels, gate realignment, localized post reinforcement |
| Post replacement with concrete footing per post | $300 – $900 | Footing depth, rebar, access, stainless fasteners for coastal sites |
| Chain link tension/top rail and 1-2 post reset per 10 ft section | $250 – $700 | Fabric replacement, concrete, gate hardware, line tensioning |
| Metal picket/section welding and refinishing | $400 – $1,200 | Extent of corrosion, sandblast/primer/powder coat, replacement pickets |
| Partial section replacement (panels/posts) per linear foot | $25 – $75/ft | Material type, post spacing, gate complexity |
| Full line replacement per linear foot | $40 – $200/ft | Fence system, site prep, permits, elevation changes |
Practical insight: those midrange numbers assume that fewer than 30% of posts need replacement and no special substrate work. If you find rotten post clusters, undermined footings, or significant galvanic corrosion, add 25-60% to the estimate. Insist your bid flags those contingencies rather than burying them in a lump sum.
Realistic timelines and common schedule traps
Timeline rules of thumb: small repairs often finish in 1 to 3 business days; partial section replacements take 3 to 7 days; full replacements usually require 1 to 3 weeks from permit to handoff in normal conditions. Expect longer during hurricane season or after a regional storm when nearby fence repair services are saturated.
Schedule trade-off: immediate temporary stabilization protects safety and claims, but it can add a short-term cost and a second mobilization fee. Choose temporary bracing only when necessary — for pool barriers, commercial perimeters, or when insurers need immediate evidence of mitigation.
Concrete example: A South Tampa homeowner reported two blown panels and a leaning post after a storm. A local crew did same-day bracing and provided a numbered photo report for the insurer. After adjuster sign-off the crew returned three days later, excavated and replaced two posts with deeper footings and 316 stainless fasteners, and completed panel replacement in a single mobilization three days after that.
Financing and payment decisions that matter
- Out-of-pocket for small fixes: lowest total cost—use this for repairs under $1,000 where no permit or permit delays are involved.
- Insurance claims for storm damage: use when cause is wind or storm; document with numbered photos and written estimates. Remember claims can add inspections and extend timeline.
- Contractor financing or payment plans: useful for larger replacements but read APR, balloon payments, and prepayment penalties carefully.
- Home equity or personal loan: cost-effective for large, permanent upgrades (deeper footings, upgraded corrosion protection) compared with high-interest contractor offers.
Judgment call: paying more up-front for correct footings and marine-grade hardware pays off in Tampa. Financing is reasonable for full replacements or upgrades that reduce future service calls; avoid using financing to paper over poor repair scope that skips below-grade work.
If you plan to use insurance, stabilize first, document extensively, and get a written scope—insurers favor documented mitigation and may deny claims for deferred or cosmetic-only repairs.
How to choose the right fence repair company
Straight rule: pick the contractor whose priorities match yours—cheap patching, durable rebuild, or fast emergency support. Deciding which matters most up front simplifies every subsequent question and reduces the chance you pay for the wrong outcome.
A practical scoring framework
Use a quick scoring method to compare bids objectively. Assign weights to the factors below based on your situation: local experience, material expertise, response time, warranty and contract clarity, and references. Tally scores to see which provider actually meets your needs rather than the one with the lowest line item.
- Local experience (30%): Has the company done similar work in Tampa Bay? Coastal jobs need specific fasteners and footings.
- Material expertise (25%): Do they show documented repairs for wood, vinyl, aluminum, or wrought iron—whichever you have?
- Response & capacity (20%): Can they do emergency stabilization or are they booked out for weeks after storms?
- Warranty & scope clarity (15%): Is the workmanship warranty written and are post/footing work and hardware upgrades itemized?
- References & proof (10%): Recent, verifiable jobs and vendor relationships (manufacturers, powder coaters, stainless suppliers).
Practical insight: weight the 30% bucket higher when you face saltair corrosion or hurricane exposure. For a pool fence or business perimeter, bump warranty/clarity to 25% because liability matters more than price.
Questions that actually reveal competence
- Show me three recent jobs like mine with contactable references and photos.
- Which fastener grades and footing depths will you use for my site and why? Expect a clear technical answer, not a vague promise.
- How do you document temporary stabilization and what does that cost? This separates responders from long-term fixers.
- Will subcontractors be used and how are they insured and supervised?
Judgment: contractors who answer with specifics—concrete mix, post size, 316 stainless where needed, exact warranty language—are far more reliable than those who avoid details. Vague answers hide assumptions that cost you later.
Concrete example: Two bids arrive for a coastal wood privacy fence. Bid A is 20% cheaper but lists only panel replacement and a 30-day workmanship note. Bid B costs more but specifies 48-inch concrete footings, pressure-treated posts, 316 stainless screws, and a 2-year written warranty. Choosing Bid B reduces the risk of recurring service calls and insurer disputes even though initial outlay is higher.
If the quote bundles everything into one lump sum with no itemized post or footing line, treat it as incomplete—ask for breakdowns before signing.
Next consideration: score two or three nearby contractors using the framework above, then pick the one that balances your primary priorities. If speed is critical, accept a small premium for guaranteed stabilization and documented scope.
Maintenance steps that extend repair life in Florida conditions
Maintenance is the difference between a temporary patch and a repair that lasts through a hurricane season. In Tampa and other Florida coastal zones, routine care targets three failure drivers: saltair corrosion, sandy soil movement around footings, and biological attack on wood. A local schedule that addresses each of those keeps small issues from forcing expensive post or footing replacement.
Practical seasonal maintenance cadence
Follow a simple cadence tied to the weather cycle rather than calendar convenience. Timing matters because inspections before and after storm season catch different problems.
- Quarterly (every 3 months): rinse metal rails and hardware with fresh water, check gate alignment, tighten loose fasteners.
- Biannual (spring and fall): inspect post plumb and excavate one suspect post to check the socket; treat or replace any soft wood at the base.
- Annual (before hurricane season): full walk of the line, paint or touch powder coat where coating is failing, document conditions with dated photos.
Material-specific quick actions
Wood: keep soil away from direct contact with posts, reapply preservatives to cut ends after any post or rail work, and replace ground-contact sections before rot spreads into the rail system. Use stainless or hot-dipped hardware near the coast.
Metal (aluminum, wrought iron): wash salt off within days after coastal spray events, touch up bare metal back to a primer before powder coat failure accelerates corrosion, and swap out plain steel bolts for 316 stainless when you repair a failed section.
Vinyl and composite: avoid heavy pressure washing at close range (it can gouge panels), check internal post sleeves for movement, and replace cracked panels promptly to prevent water intrusion at connection points.
Practical trade-off: upgrading to marine-grade fasteners and deeper footings adds cost up front but reduces call-backs. If budget forces a choice, prioritize correct post/footing work over cosmetic finishes — sound footings are non-negotiable in sandy soils.
Concrete Example: A homeowner in South Tampa washed salt off an aluminum pool fence after a storm, then scheduled a professional inspection. The tech found several fasteners starting to pit; replacing them with 316 stainless and touching up the primer prevented early failure and avoided a full-panel replacement the following year.
Common mistake to avoid: using aggressive pressure washing and paint-over fixes that hide pitting. In practice, concealing corrosion delays the inevitable replacement and creates a safety risk if the run secures a pool or business entry.
Next consideration: when you call a fence repair company near me, ask for a maintenance add-on priced separately from repairs so you can compare the lifecycle cost of recurring upkeep versus a more robust one-time repair.
Documenting repairs and next steps with Vilo Fence
Good documentation is not optional — it is the tool that protects your money, your timeline, and your insurance claim. Treat the post-repair packet like a small construction closeout: it should prove what was done, why it was done, and what still needs monitoring.
What you should get from the contractor. Ask Vilo Fence (or any nearby provider) for a breakout packet that includes: a written scope linking each line item to work performed; sequentially labeled before-and-after photos; materials list with grades and part numbers; permit closeout or filing receipts when applicable; and a written workmanship warranty with start and end dates.
How to use documentation effectively
Practical steps for claims and follow-up. Store photos and documents immediately in one folder named with the job address and date, for example 123-Main-St_2026-03-01. When filing insurance or HOA paperwork, include the contractor scope as Exhibit A and reference exact photo numbers for each damaged section. If a permit was required, keep the permit number and final inspection sign-off in the same folder — insurers and HOAs ask for that specifically.
- Essential files to request: sequential photo set, detailed invoice tied to scope, material specs and fastener grades, permit/inspection documents, warranty certificate
- Digital best practice: ask for high-resolution JPEGs and PDFs on a USB or emailed download link; check timestamps and file names before accepting
- Follow-up scheduling: get the recommended maintenance check date in writing and a point of contact for post-warranty questions
Trade-off and limitation to expect. Fully documented work takes an inspector and an office to produce; some lower-cost crews will resist providing high-resolution files or itemized scopes to save time. That saves you little money in the long run because undocumented repairs are harder to substantiate for claims and more likely to be reworked.
Judgment you can use now. A contractor who provides immediate digital copies, a clear warranty, and a scheduled follow-up is signaling project discipline. If Vilo Fence offers a seasonal check as part of the warranty or for a small fee, that indicates they design repairs to last in Tampa conditions rather than delivering band-aid fixes.
Concrete example: After a high-wind event a small commercial property had a collapsed chain link section. Vilo Fence performed temporary bracing, supplied a download with sequential photos and an itemized permanent repair scope, and returned three weeks later to complete the job after the insurer approved the claim. The business used the contractor packet to close the claim without multiple site re-inspections.
Keep everything dated, labeled, and tied to the work scope. If a contractor balks at producing that packet, consider it a red flag.
Frequently Asked Questions
Straight answer first: when you search for a fence repair company near me you need clear expectations on response time, whether a permit is required, what insurers will accept as mitigation, and how accurate a photo-based estimate can be. Below are concise, practical answers that matter in Tampa Bay, not sales copy.
How fast can a local crew respond after a storm? Expect three tiers: immediate temporary stabilization (same day to 72 hours), prioritized permanent repairs for safety-critical lines (3 to 10 days depending on backlog), and nonurgent work scheduled after permit or supply timelines. Trade-off: same-day action often means a second mobilization for permanent repairs.
Do repairs usually need a permit in Tampa? Minor fixes rarely do, but any work that replaces posts, changes footings, or alters a property line will often trigger a permit. If you want a quick check, have the contractor confirm permit requirements and include the City of Tampa permit number in the estimate — see City of Tampa Building Permits.
Will my homeowner policy cover hurricane or wind damage? Coverage varies. Insurers commonly approve documented storm damage but deny claims for neglected maintenance. A practical ritual: get numbered before photos, temporary stabilization, and an itemized estimate before the insurer inspects.
Can I get an accurate quote from photos alone? Use photos for a realistic ballpark, not a binding price. Limitation: photos rarely reveal footing depth, hidden rot inside posts, or subsurface corrosion. Always budget for an on-site verification visit before final signoff.
What warranty should you insist on? Demand a written workmanship warranty with specific start/end dates, plus manufacturer coverage for replaced materials. Vague promises or handshake guarantees are not acceptable for safety-critical or pool-barrier work.
How much will a small panel or post replacement typically cost? Answers depend on material, access, and below-grade conditions. Use any remote estimate only to screen contractors — insist on an itemized final quote showing post/footing, materials, labor, and permit fees so you can compare bids fairly.
Concrete example: A Davis Islands homeowner sent three clear photos of a leaning privacy section. A nearby crew performed same-day bracing, supplied numbered photos and a two-option quote (repair posts vs full replacement with deeper footings). The owner used the documentation to get insurer approval and chose the stronger footing option to avoid repeat work.
Judgment you can use right away: prioritize contractors who separate temporary stabilization from permanent scope and who list material grades (for coastal jobs, look for 316 stainless and specified footing depth). Cheaper lump-sum bids often skip the durability items that matter in Tampa’s environment.
- Action 1: Take three labeled photos (wide, ground-level of damaged post, gate/hardware close-up) and note HOA or pool proximity before contacting contractors.
- Action 2: Request an itemized estimate that separates post/footing work, materials, permit fees, and temporary stabilization costs.
- Action 3: Ask the contractor to record temporary mitigation and provide numbered photos immediately so you can file insurance or HOA paperwork without delay.